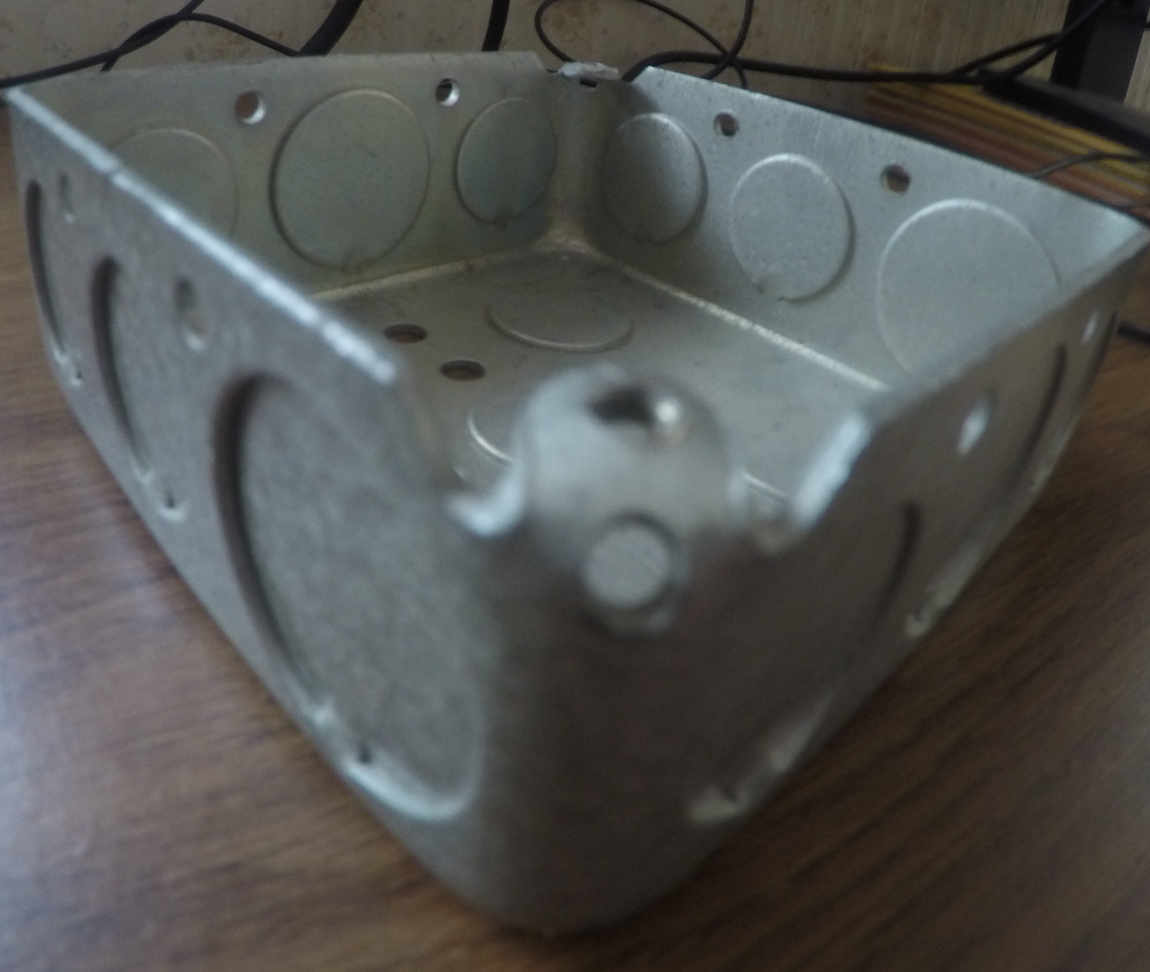
I've had a quick go - it's hard to be more precise without measurements, and it should be stressed that the actual bent shape of the metal is very weird, and difficult to model. Hopefully this will give you a method to get started with, however, and you can adjust spline handle lengths and dimensions etc. as you go.
The steps go as follows:
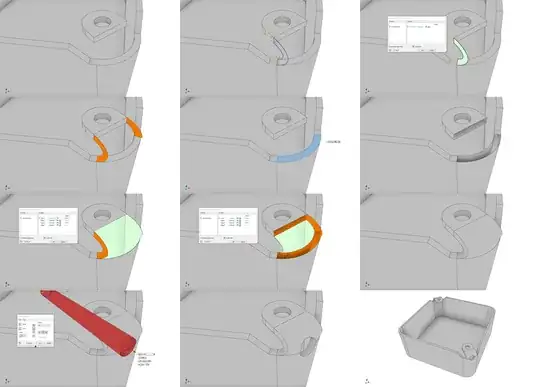
- Model the 'non-weird' bits, and float them in space.
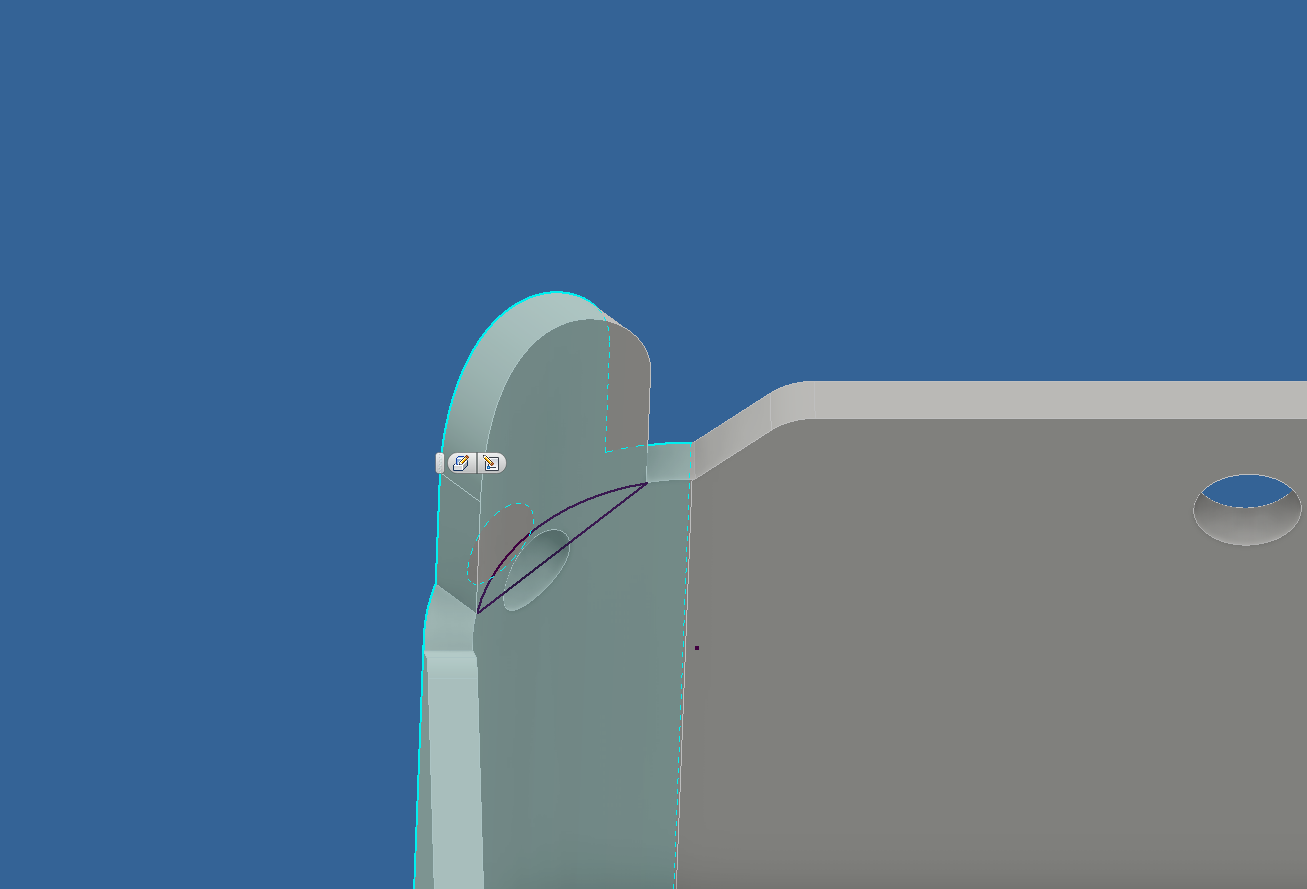
- Create a 3D sketch with splines connecting the two bodies, set to be tangent to the edges. Right click the spline, and click "activate handle" to give yourself more control over its form. Also include lines connecting these splines to create a closed loop.
- Use "Boundary Patch" to generate a surface body inside the 3D sketch you just created
- Mirror the Surface Body to create a symmetrical copy of it.
- Sketch on the surface that will have the bend attached, and draw two lines. Use the split tool to split the surface accordingly.
- Use the Delete Face tool to remove the faces of the solid body which will join the bent part. It has now also become a surface body.
- Use Boundary patch again to create the outer face of the bend this time with automatic edge chain deselected, and selecting the edges of the surface bodies, rather than anything in a sketch. Set a Tangent Condition on the edges that are 'bent', and leave it as Contact for the 'cut' edges. of the tab.
- Repeat for the inner face of the bend
- Use the 'Stitch Surface' Tool, and uncheck "Maintain as Surface" to merge all the surface bodies and create a solid.
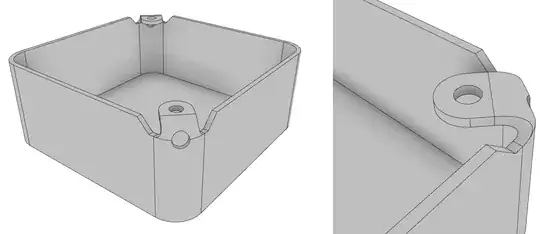
- Create a new work plane at a slight angle, and sketch a circle on this for use as an extrude cut for the cutout hole. This is an approximation, of course. You could use the draft tools to create a taper in this hole closer to real life, but without the object for reference, I've decided this is good enough - you can experiment with other methods!
- All Done
- Mirror/Rotate/Whichever to create the opposite side of the box. Also, to create a 12th point on this list and make my image nicer :) High resolution version available here